Wednesday, March 20, 2013

Cherry Cupcakes

I think I'll bake some cupcakes today, more for the purpose of using up some cake mix in the pantry than for any other reason.  My waistline certainly doesn't need it!  Of course, it also gives me something to post about.  Except that I don't think these will be anything fantastic, just your basic, slightly-doctored-up cake mix with frosting.  I'm even going to use one of those little packets of frosting flavors in my home made buttercream.

However, if I'm to be completely honest with myself, I think I'm procrastinating finishing the purse pattern I told you all about a few weeks ago.  In defense of myself, I did take photos of the green bag I posted pictures of in order to add them into the pattern, but many of them turned out so blurry I need to make it again just to take the pictures!  And, oh, I can come up with many reasons to put that task off-I don't have the yarn I want to use (bought it weeks ago now), my husband isn't available to help me take the new pictures (which was the problem before, and I tried to take them on my own), my nail polish is chipped (that one seems to be a constant problem)-as you can tell, I'm pretty good with the excuses!

So, on to the cupcakes.  I mentioned that I want to use a frosting flavor--Duncan Hines has put out these little packets of fun flavors to use with their canned frosting.  Well, I have to admit--I hate canned frosting!  I know of very few people who actually prefer the taste of canned over home made frosting-if you're one of them, ignore this part!  Feel free to use the canned stuff!


If you're more like me, though, then proceed.  :-)  You can use the flavor packets with your own home made frosting with great success.  Today I'm going to use the cherry vanilla flavoring.  I've never tried it before, but I think it's a great choice for the first day of spring!

In my experience with the Duncan Hines frosting flavors, they are quite sweet.  Definitely for the kid in us!  I'm going to try and down play that a bit in the cupcake.  I'm using Betty Crocker yellow cake mix, and I'm going to change it up a bit like I usually do when using cake mixes.  Simply replace the water with an equal amount of whole milk (if all you have is low-fat, that's okay too!) and replace the oil with melted butter.  Please do use real butter!  In addition, I'm going to add in some chopped maraschino cherries and pure almond flavoring.

I debated a bit with myself on the cherries--maraschino cherries are hardly "real" cherry flavor!  I have some home made cherry jam that I might have added--but then, I thought it might also add extra sweetness, and I don't want that.  After tasting a bit of the batter, I think I made the right choice.  It reminded me of the cherries in Ben and Jerry's Cherry Garcia ice cream!  MMM!  I wish I had some dark chocolate chunks--must remember that for the next time!


Anyway, I added about a teaspoon of the almond flavoring.  Almonds and cherries really go good together, a very classic combination.


By the way, did you notice my nice orange-ish batter?  That's because I thought I'd try adding a little of the cherry juice to color it a bit, and the red combined with the nice dark yolks from my hen's eggs and made that lovely orange.  Oh well, no biggie.  I might have avoided that if I wanted to substitute 2 egg whites for each egg.

All ready to go into the oven!


Now for the frosting.  I do make a pretty traditional American butter cream, although sometimes I'll play around with the ratios of ingredients.  Today I'm only going to use 1/2 cup of butter instead of a whole cup ;-)


 Cream it, then add the powdered sugar, about 3-4 cups.  I use a Kitchen-Aid stand mixer, which is pretty heavy duty, but if you are using something with less power, you might want to add a tablespoon of milk to make it a little easier on yourself.

Then add in the frosting flavor:


And add in milk to achieve the right consistency.  How much is that, you may ask?  Depends on how you want to frost--just a little milk (try a teaspoon at a time) if you want to make those nice swirls with a pastry bag and decorative tip.  Add more milk if you want to spread it smooth with a metal spatula or knife.  You can even make it thin enough to dip the tops of the cupcakes into the frosting and cover them that way--the choice is yours!  If you go too far with the milk, simply add more powdered sugar, one tablespoon at a time, to get it back to where you want it.

Truth-telling time:  I found out I didn't have as much powdered sugar as I thought AFTER I started this recipe, so I simply used up all I had, and then thinned out the frosting so that I could stretch it as far as I could!

Frosting--yum!


Definitely needs a cherry on top!


Time to taste--drum roll, please!

Oh my, this is good!

I think I stumbled onto something here--the almond flavoring in the cake is soooo good, it brings up the cake mix several notches in my book!  I bought this through one of the best online baking sites: King Arthur Flour. They have excellent ingredients, even if the shipping is expensive if you live on the West coast like me!  They do have free shipping offers from time to time, however; be on the lookout!


I only added about 1/3 cup of chopped cherries, and they are very yummy in this cake, and I could see adding about twice that amount.


But, even as they are, they are delicious!

The frosting is pretty good, too.  I think I'd play around with using the maraschino cherry juice to flavor my buttercream the next time, and save myself the trouble of an extra ingredient.  But then, that flavoring packet isn't too bad--I'll have to try it without and see which is better.

Next time, I'll have on hand some dark chocolate chunks to throw in--oh, my, wouldn't that be good!

That's it for today...I think I'll have another cupcake!

Vanessa


Thursday, March 14, 2013

Red Beet Eggs

I can't believe that, given I grew up in PA Dutch country, I've never made red beet eggs at home.

They are so good!

And, as I found out this week, so darned EASY to make!

Now, add that to the fact that for the past, oh, six years or so of country living, my family has often had to deal with an overabundance of eggs from our hens, to to the tune of sometimes having as many as fourteen dozen eggs in our fridge at any given time.

That's fourteen dozen.  One-four.  That's 168 eggs in my family's refrigerator.

We like eggs, but most of the time we have a hard time with eating this many, and I think I've noticed friends go running the other direction when they see us coming, egg carton in hand.  We've even been known to not let complete strangers leave our property without taking home at least a couple of dozen!  So, you'd think I'd have figured out long ago what to do with all those eggs aside from letting my boys see how far they can throw them into the field across the fence.

In comes the idea for making red beet eggs.


Without fail, my California friends are like, "red beet what?" when I tell them about these pickled delicacies. A few folks really don't like beets, either, to which I have no response.  I do love the earthy goodness of beets, fresh boiled, roasted, or pickled.  Not everyone has the same opinion.  

But, if you do like beets, you'll probably love red beet eggs.  And with Easter just around the corner, they'll make a pretty addition to your Easter dinner table!


These are super simple to make, and take only as long as it takes to hard boil some eggs.  Oh, and I found out a cool trick for that, too!

Since we've had fresh eggs, I've found it super hard to peel them without losing half of the whites.  Now, I know that the fresher the egg, the harder it is to peel.  But even with eggs that have been in my fridge for a couple of weeks it seems I can't peel them to save my life!

Pinterest to the rescue. (don't you just love that website?!)  About a teaspoon or so of baking soda added to the water while boiling these beauties let the peel practically slide right off!  Now I don't have to buy a dozen eggs at the store when I want to make deviled eggs (or red beet eggs!)

Okay, enough talking.  Want to try these?  Here's the recipe:

Red Beet Eggs

for one quart jar:

1 14-oz can of sliced beets (not the ones already pickled)
1/2 cup white vinegar
1/2 cup sugar, or more or less to taste
6 eggs, hard boiled and peeled

Drain the juice from the can of beets into a saucepan and add the vinegar and sugar.  Bring to a boil, then cover the pan and simmer for about 15 minutes.

Meanwhile, add the still warm, peeled eggs to the quart jar, and cover with the drained, sliced beets.

Pour the hot vinegar mixture over the eggs and beets in the jar, adding a little water if needed to fill the jar to within 1/2 inch of the top.  Screw on the lid, place in the refrigerator, and you're done!

Wait at least three days to eat.  Red beet eggs will last 3-4 months in the fridge, according to the National Center for Home Food Preservation. I think once you've tried them, they won't last that long though ;-)

Vanessa


Tuesday, March 12, 2013

Lemon Cupcakes with Raspberry Curd Filling

Until I can find the time to sort out various pages of my blog, I will post my kitchen exploits here as well!

It was girl's night out again, and I was bringing dessert.
I love to tempt folks with recipes that they may not otherwise find at the typical grocery store....chocolate cupcakes with chocolate buttercream frosting may be good, but one can find those anywhere.

I thought of what I had in the kitchen...hmm, lemons are good....lemon cupcakes, even better.  I have made lemon meringue cupcakes that are delicious, but I wanted to try something new.

What tastes great with lemon?  Raspberries!  I Googled "lemon raspberry cupcakes" and came up with a few recipes.  The one I liked most had lemon cake, lemon butter cream frosting, and raspberry curd.

Raspberry curd?  I'd never heard of that! Lemon curd is recognizable here in the States as that yummy filling of lemon meringue pie, but I'd never thought of using berries of any sort to make the same kind of filling.  I could see by the recipe that it wasn't difficult to make, and didn't require any odd ingredients.  Perfect!

I decided to follow some of my own recipes, and use the curd recipe I'd found online. ( I tried for the life of me to create a link to the website for you, but I cannot get it to load!  The website is this: www.smells-like-home.com, and you'll find the recipe under May 2012.  My apologies to that blog's creator!)

 This is my finished product::


 Now I'll tell you how I made them!  Follow along with the pictures, and I'll post the full recipes at the end.

First, you'll make the curd because that needs to be completely cool.  You can even make it a couple of days ahead if you like.  My apologies for not taking multiple photos of the process, but below you can see the end result of pressing the cooked curd through a sieve to get rid of the seeds:


And this is the cooked, deseeded curd, a mixture of butter, egg yolks, sugar, lemon juice and raspberries:


You'll want to cover this and put it in the fridge to cool completely.  It will thicken up a bit more when it's cool.
As this was the first time I'd made raspberry curd, I wasn't exactly sure when to tell it was ready to take off the burner.  I do wish I'd cooked it a little longer to see if it would thicken some more, or maybe add a bit of cornstarch (like I do for lemon meringue filling).  Still, it worked out okay!

For those of you able to locate the original recipe, you'll notice that I made a different cake and frosting recipe.  I have my own for vanilla cupcakes that I've adapted from the Sprinkles strawberry cupcake recipe (and that recipe is delicious as it is, but I omit the strawberries and use less sugar!) 


You'll need lemon zest.  This is the yellow part only of the rind, and a lemon zester really helps with that:


Mix the flour, baking powder, salt, and lemon zest together:


Cream the butter and sugar:


Add the egg yolks and egg whites:


Add the vanilla to the milk, then add the flour and milk to the creamed butter and sugar mixture, a little at a time:


As you can see, the final batter is quite thick!  Yum!

Scoop the batter into cupcake tins; ice cream scoops are great for this task!


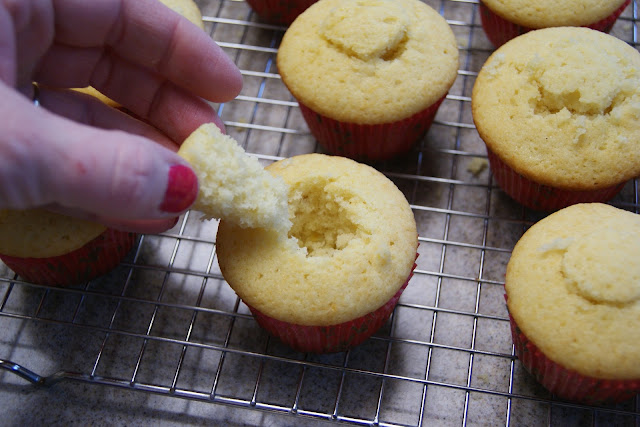
Use a paring knife or vegetable peeler (the pointy end!) to cut little holes from the tops of the cupcakes.  You can take of a little of the cake off the bottom of those cones if you want:


Fill those holes with the cooled raspberry curd:


and put the tops back on!


Now make the frosting.  I didn't take any pictures of that process, sorry!  I did, however, take this nice shot to tease you all with:


I didn't have any raspberries left over, or I would have decorated the tops of these yummy treats with a fresh raspberry.  They'll just have to do as they are! 

Enjoy!


Before I give you the recipe, let me discuss a little about the ingredients.  I use real, whole food products whenever I can, because I believe that if we are incorporating these yummy treats into our diet in small amounts, we should be enjoying the foods as God intended them to come to us!  No cow ever produced non-fat milk, and margarine is two steps away from plastic!  Yuck!

Plus, whole milk, real butter, etc., affects the final product, called "mouth-feel" in the case of cake.  You'll have better tasting food, and the cake will be more tender than if you used non-fat or even low-fat dairy products.  Yes, you can use what you like, and it will still be a cupcake, but not the same as mine! ;-)

I don't pretend that this is healthy, and I'm sure arguments can be made about how God didn't intend for powdered sugar to exist in any form and how even unbleached all-purpose flour is a long way from whole-grain flour, but there ya go!

Now, here's the recipe as I made it:


Lemon Cupcakes with Raspberry Curd Filling and Lemon Buttercream Frosting
makes 24

Raspberry curd

  • 8 Tbs unsalted butter
  • 1 pint raspberries (2 of those small plastic clamshell boxes)
  • 5 large egg yolks, lightly beaten
  • 3/4 cup sugar
  • pinch of salt
  • 2-3 tsp. fresh lemon juice
Melt the butter in a large saucepan over medium heat.  Add the raspberries, sugar and salt, and stir until blended.  Temper the egg yolks by adding a little of the hot raspberry-sugar mixture into the egg yolks, then add all the yolks back into the raspberry-sugar mixture in the saucepan.  Stir frequently until the mixture boils, then constantly until thickened, about 10 minutes.  Set a sieve or coarse strainer over a bowl and pour the raspberry mixture into the sieve, then press down with the back of a spoon to force the curd into the bowl below, leaving behind the seeds. Stir in lemon juice to taste, cover, and put curd into the refrigerator to cool.  Can be made up to 3 days in advance.

Lemon Cupcakes


  • 3 cups all-purpose flour
  • 2 tsp. baking powder
  • 2 Tbs lemon zest
  • 1/2 tsp. coarse salt
  • 1 cup whole milk
  • 2 tsp. vanilla
  • 1 cup unsalted butter, room temperature
  • 1 3/4 cups sugar
  • 2 large eggs
  • 4 egg whites


Preheat oven to 350 degrees F.  Line cupcake tins with 24 cupcake liners.

Whisk together the flour, baking powder, salt and lemon zest in a medium bowl; set aside.

Add vanilla to milk; set aside.

In large mixing bowl, cream butter until light.  Add sugar, a little at a time until light and fluffy.  Add whole eggs and egg whites, blending until just mixed together.

Add about half the flour mixture and just blend, then add half the milk mixture.  Scrape down sides of bowl, then add the rest of the flour, and then the milk, scraping again as needed.

Divide batter among cupcake cups.  Bake for about 22-25 minutes, or until the tops of the cupcakes are just dry to the touch.  Transfer cupcakes from tins to a wire rack and let cool completely.


Lemon Buttercream Frosting

  • 2 cups unsalted butter
  • pinch of coarse salt
  • 7 cups of powdered sugar
  • 1 tsp. lemon juice, or more if needed to achieve correct consistency
  • 2 Tbs. lemon zest
Cream butter and salt until light and fluffy.  Add powdered sugar, one cup at a time, until all is blended, scraping down sides of bowl as needed.  Add lemon juice and zest, mixing completely.  Add more lemon juice (or milk if you don't have more juice) to achieve desired consistency for frosting.  You want it to be thick and dense, not too airy (which can happen if you over-mix it).

To finish cupcakes:

Cut a small hole in the tops of the cupcakes and spoon in the raspberry curd, then replace the tops of the cupcakes.  Frost and decorate as desired. Enjoy!


Vanessa


Thursday, February 28, 2013

Itsy Bitsy Messenger Bag

I've been trying to find time to start up a pattern business, but I've found that even though I can read any crochet or knit pattern, in symbols or by chart, it's harder to write them for someone else to be able to follow!  This purse is an example of my first attempt at such a thing.  I'm still working on the pattern--even though I can recreate it (and have, several times over!) I'm working on making it so that even a beginner crocheter could successfully make it.


At first, I made it without the flap, but I really like it better with it! It makes the perfect size messenger bag for my daughter's American Girl dolls, or she can carry it for herself. I admit I don't love it in this particular shade of green (although I do think it looks better in person--trying to capture it's color is hard to do) I do love this yarn--Caron Simply Soft Party.  It comes in several fun, bright shades, all with a bit of sparkle thread running through it.  There's a cobalt blue that's really pretty, plus a bright pink, purple, white, and this green.  You can find it at JoAnn's- that's where I got it-but today I'm heading to Michael's and I hope to find it there as well.

When I finally have the pattern finished, I'll post a link to my Etsy shop for anyone interested in buying it.  I'll include several options for the finished bag--with or without the flap, plus options for the strap.  It will also make a really cute Easter purse for a little girl; in fact, that's what I plan to do with the new yarn I buy today! I'll probably add some flowers to make it much more Spring-timey.  I'll show you all what it looks like when I finish!

Vanessa


Friday, February 22, 2013

A Beaded Crochet Necklace for a Dear Friend

A good friend is celebrating her birthday this weekend, and I knew she would appreciate something handmade, so I set about trying to think of something she'd like.  I know she loves to shop and look good, so of course jewelry came to mind fairly quickly!  And, I wanted to make something crocheted.  This beaded necklace was the perfect solution.


I love these colors, they are my favorite and they happen to look great on my friend as well :-)  Let's see what I started with:

Silver DMC embroidery thread...of course any color would work!


Glass beads..I kept the sizes separated because I wanted to space the larger beads between the smaller ones...


Two clamshell crimp beads.  You will also need a closure of some sort, which I don't picture here.  (see below in my final product for my attempt and getting a picture of it!)


 Using a beading needle, I then strung the beads onto the thread.  Don't be afraid to put too many on, because you don't need to use all the beads you put on, but you won't be able to add beads once you've started your chain.

 I forgot to mention that I (sort of!) wound the thread into a ball.  It wasn't easy, at least for me, but if I hadn't done it then the thread would have knotted up on itself!


Start making a foundation chain with a very small hook.  Slide down the first bead when you're ready to add one....


  With the bead up against the last chain you made, make the next chain right over it...it's easier to do than to explain!

  
Just keep crocheting the chain and sliding the beads down the thread to add them in when you wish.  When you get it as long as you like, finish off just like a crochet chain by pulling the tail through the last chain made.  Make sure you leave enough of a tail to work with later!  I made three chains, but you can do as many as you like.


I tried to get a picture of the clasp here.  Basically, thread the ends of your chains through the bottom of the clamshell, then tie a knot with all the threads at once and slide it down as tight as you can against the open part of the clamshell.  Place a little dab of glue or clear nail polish on the knot, then close the clamshell shut.  Add your clasp and you're finished! Want to see it again?


This was simple to make, and it went together very quickly.  All told, it took me two hours to make this, and that included time out to paint my daughter's fingernails! I'm sure with no interruptions, it would take an hour or less to make a beautiful piece of jewelry for yourself or as a unique gift!


Thanks for reading!

Vanessa

Wednesday, February 20, 2013

Snow in the Desert

I live in Southern California, in a rural area that is between our very own wine country and the resort city of Palm Springs, one of the hottest places in the summer with temperatures reaching over 110 degrees Fahrenheit every year.   One of the things that makes this area geographically unique is that we have these extremes of super hot, dry, heat right alongside regions with high elevations and snow skiing in winter.  My house is in between, not being quite so hot as Palm Springs, and being at high enough elevation to give us snow once or twice each winter.  Today my children were elated to wake up to a couple of inches of freshly laid snow, and it is a day off from school to boot so they could play all morning in it!


The beauty of this snow is that by the end of the day most of it will be gone, and other than picking up a few broken branches from around our property there will be no clean up, like those of you in the really cold northern locales have to deal with every winter!


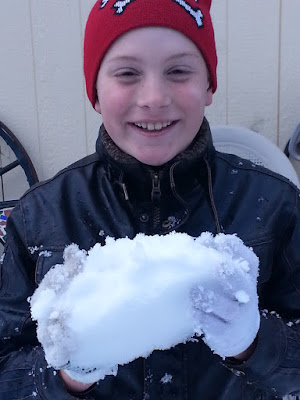
All this cold weather got me thinking it was really time to work on a new blanket for my younger son (he's the happy one above getting ready to chuck some snow at me!) We're in the planning stages of redecorating his bedroom, and we've chosen a contemporary color palette of teal blue, grey, orange and lime green, so of course, these are the colors I've chosen to do his blanket in.


I made this sample swatch in a wave and cluster pattern, and while I like the look of it, I'm not crazy about how stiff the finished fabric feels, and the clusters use up quite a bit of yarn.  So, I'm going to skip the clusters and make a wavy chevron instead.  I like the color sequence though!

Before I settled on a striped pattern, I had tried making a couple of squares in the same colored yarns.  This twisted square was a really fun one:


  And then, there was this one below:


I really liked this square, but I thought it would be too feminine for my soon-to-be eleven year old son!  (Happy Birthday tomorrow to him!)  Maybe I'll use it in softer colors for my daughter some day.

So that's what's going on in my brain today with crochet!  Happy hooking to the rest of you!

Vanessa


Sunday, February 17, 2013

Cute and Quick Hat

Sometimes you never know where you are going with a project until it's finished.  This morning's crochet undertaking is an example of that.  It was a perfect morning--quiet, with the kids sleeping in after staying up way too late last night with friends.  As we are usually very busy with outside activities and school, having a day at home is a gift not to be squandered! It was a good opportunity to just sit and play with yarn.

So, I sat down with my coffee, fingers itching with anticipation.  First, I worked for a bit on the Diamond Carat scarf I posted about yesterday.  But, I wanted to make something and complete it--remember the crafting ADD?  Hats are the perfect sort of project for that, especially in a super bulky yarn. I picked up this Wool-Ease Thick & Quick yarn by Lion Brand Yarns right after Christmas when Wal-Mart had a great sale on it--only $1.88 a skein!  So I grabbed a big hook and got started, shaping the hat as I went.  A couple of rounds got ripped out as I went along, as I knew I wanted it shaped like a beret,  but not too big, and I wasn't completely sure what number of stitches was going to accomplish that goal.  Finally, I came up with a cute hat that fit my adult head fine, if a little snugger than I wanted, but looked perfect for my 8-year-old daughter, especially with a felt flower added to it (which I made for her as a barrette a few month back). What do you think?


I think it took me all of an hour and a half to make this, maybe two.  Considering I was making it up as I went along, I think I could make another in much less time!  I could post the pattern if anyone is interested; just leave me a message in feedback and I will!

Have a great Sunday!

Vanessa